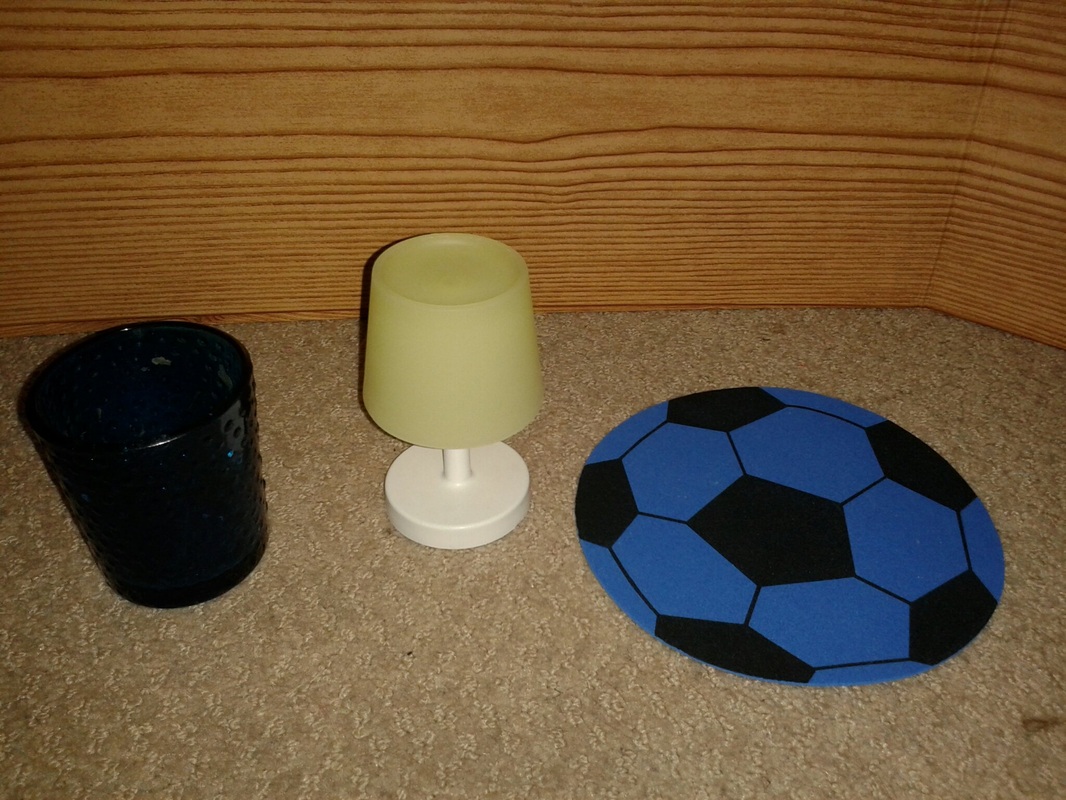
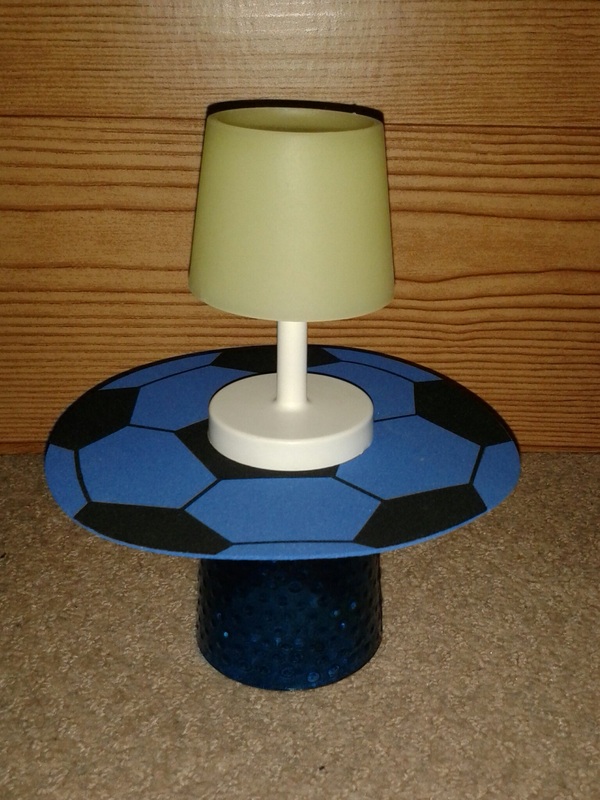
A bedside table is one of the easiest pieces of doll furniture to make. Just take a candle holder or cup and flip it over. Then tape your foam circle onto the flat surface. To make it more sturdy, layer several foam circles or attach the foam to a circle of cardboard first. Try different shapes like stars, hearts, or cars, I decorated my table with this cute glow-in-the-dark mini lamp, also from the dollar store.
0 Comments
My daughter has been planning her American Girl birthday party forever, and she has been harassing me about making her birthday cake for weeks, even though her birthday is not until NOVEMBER!! So I decided to make a "practice cake" with mini Saige just for fun. We even ate a pizza and made a party of it. I thought it turned out pretty cute. I used a ceramic mug for the top part of her skirt and a small class bowl for the bottom. I used a small box of cake mix from the dollar store, and it was the perfect size for our little practice cake. The bodice and belt is made from a Laffy Taffy rope, rolled out and shaped by hand. I pressed some shiny silver sprinkles into the bodice and sprinkled them onto the skirt, and I added candy stars and a large candy heart. I wrapped mini Saige in Press N Seal wrap first, and she did not get any candy or frosting on her. I dressed big Saige in a fancy dress from Springfield Collection, which was purchased from Joann with a 40% off coupon, making it $6. Her flower is from an old dance costume. One of my favorite doll blogs, Living a Doll's Life, recently featured 18 inch boy doll options, so I wanted to share my custom boy doll Emmett. My son is 6 years old, the middle child and only boy, sandwiched between two sisters who are both avid doll lovers. He started asking about a boy doll last year, but I just couldn't find the right doll for him. He wanted the 18 inch size, one that looked about his age, not a baby. I thought about AG Bitty Twins, but those have more of a toddler look and are still quite expensive. I didn't really like the other options I saw, so I went on a mission to create the perfect boy doll for him. It was easy to find the base body doll, an old Kingstate Friendship Kids doll whose wig was in terrible shape. I finally found the perfect wig for him on a thrift-store doll I got for $4! The original doll came in a pretty gender-neutral outfit, so I just had to swap out the floral t-shirt for a plain white one. He is a bit smaller than American Girl and Our Generation dolls, with a slightly smaller head and feet. His clothes can fit other 18 inch dolls, but his shoes are a little snug. He fits well in most typical 18 inch clothes, and I especially like the Springfield Collection from Joann. He has a soft body that extends to his upper arms and legs, so he can't stand on his own and doesn't look good in super short sleeves (especially since his arms are prone to come off, so they are wrapped at the top in medical tape. My son chose the name Emmett after the hero of the Lego Movie. Emmett likes all the same things as my boy: cars, ninjas, sports, Legos, and dogs. My son says he would give him 4 out of 5 stars. Not bad for under $20, huh?
In keeping with the 50s theme from Camp Doll Diaries this week, I put together this quick and easy 50's look from a baby dress. I really like the square neckline decorated with tiny pink embroidered flowers to contrast with the lovely minty color. I put the dress on the doll and overlapped the sides in the back so the neckline was not so large. Then I tied a ribbon around the waist to hold it closed. I arranged the pleats in the front so the skirt poofed out more, and I also used a tulle underskirt (from a thrifted porcelain doll) to make the skirt look nice and full. I finished off the look with a high ponytail tied with a satin bow. The pearl necklace is made from a decorative eyeglass chain from the dollar store. The shoes are from Paradise Kids. Saige is ready for a sock hop!
The theme for this week over at Camp Doll Diaries is all about the 1950s, so I decided to post some pictures of the 50s inspired felt skirt I made for my "vintage" vinyl doll a few months ago. This was my favorite play doll when I was a little girl, and I loved it to death, literally. The hair just got un-salvageable, so I shaved it off, and I use a variety of different wigs for her. This one is what I call the Laura wig, because it reminds me of my sister Laura's hair when she was younger. I got it from an extremely ugly porcelain doll that I rescued from a thrift store and rewigged with a much more suitable style. This wig looks great on many different dolls, and I especially Iike the look of it with this Nifty Fifties style. I sewed on a strap of thin, clear, elastic cord, so it holds the wig on the doll's head without having to glue it down. I prefer to make the wigs non-permanent so I can change them up whenever I wish. Hope you are all having a safe and happy 4th of July. The dolls wanted to pose for a group shot in their patriotic attire. Happy Independence Day!The mini dolls were excited to join in the Mini Miss Liberty Pageant this year. The winners get to ride on a special float in the parade. Their outfits show several different ways to create inexpensive clothes for your minis. Here's how I made each one:
Mini Caroline is practicing to perform the U.S. National Anthem at Camp Doll Diaries this week. The Star Spangled Banner has special meaning to her since it was written in her time period, during the War of 1812.She is holding a mini flag cupcake pick and posing next to an early-model flag, which came from a Betsy Ross dress-up set.The stage was really easy to make. I just used a wooden box from an old puzzle. I turned it upside down and stapled some fancy ribbon around the sides. Then I attached two thin dowels and ran a piece of ribbon across the top, tying the ribbon to the dowels and letting the ends hang down. For the final touch, I stuck on some foam star stickers, which I got on clearance at Rite Aid last year.
The other day I was playing around with a couple of bandannas and discovered these fun patriotic looks for Independence Day. Grab a couple of brightly colored bandannas or handkerchiefs and try it for yourself! Sleeveless Dress and Shawl
Easy Skirt and Top
Two-toned Dress
Photo Details: Golden shoes are from Springfield Collection. Mini flag is from Dollar Tree. Headband is home-made with fabric scraps and a hair elastic. Bandannas were purchased from Walmart.
|
Categories
All
Archives
January 2017
|