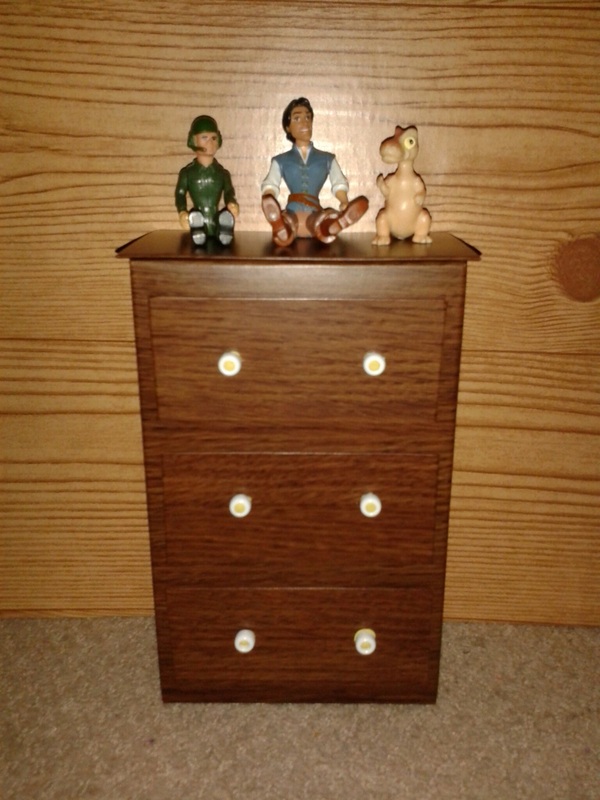
I love doll pieces that are functional as well as decorative, so I wanted to make a dresser that can really be used for storage (but without the hassle of real drawers that pull out). This dresser has a flip-top that opens to store items inside the box. I also found a great tutorial from My Froggy Stuff for making a dresser with a hole in the back to stash stuff inside. I made the drawers look more 3-D by wrapping pieces of cardboard in contact paper rather than using flat scrapbook paper.
Materials:
- 1 cardboard box the size you want your dresser to be
- 1 extra box or pieces of thin cardboard
- 1 roll of wood-grain contact paper (or sheets of scrapbook paper)
- Strong double-sided adhesive or glue gun
- Craft beads
- Thin magnets (I got mine from a phone book!)
Instructions:
* For an easier variation (which I discovered after completing mine, of course) is to cover both ends of the box and glue the top down all the way, Then just cut a small hole in the back to access the inside of the box for storage.
- Cut a large piece of contact paper and wrap the box like a present. (I left mine open at the top and then cut the contact paper to fold over the flaps so they could still open.)
- Cut a cardboard rectangle slightly larger than the top of the dresser. Wrap it in contact paper and firmly attach it to one of the top flaps. Attach a thin magnet to the underside of the dresser top and another to the opposite box flap to hold the dresser closed.
- Cut out cardboard rectangles the size you want the drawers to be.
- Cover each drawer in contact paper and firmly attach to the front of the dresser.
- Attach beads to the front for drawer handles. (I used sticky tack to put the beads on so they can easily be changed for different styles. Be sure to glue securely if your dresser will be used around small children, though.)
- Cover the top of the dresser with a small piece of fabric and knick-knacks to suit your doll.
* For an easier variation (which I discovered after completing mine, of course) is to cover both ends of the box and glue the top down all the way, Then just cut a small hole in the back to access the inside of the box for storage.
 RSS Feed
